moved

Fo Reals Mom has changed to Fo Reals Life and we have MOVED to http://www.forealslife.com Come visit us there and like our new Facebook page! We are doing a giveaway through the end of February to celebrate the change.


February 11, 2013

Method: Quick Roasted Garlic

Don't you just love the mellow and sweet taste of roasted garlic? I do. And the smell of roasting garlic makes any house smell inviting and warm. Of course, it's easy to forget to get garlic roasting an hour before you need it. Sometimes having the oven on for an hour can be just FAR TOO MUCH.

I've seen that some people microwave it but I'm not interested in that. You don't get it roasted so much as steamed. Something about the microwave also takes away from the aromatics of the garlic.
Maybe you want to get it done in a quarter of the time though? I've got you covered on that.

Quick Roasted Garlic 


Step 1: Get your oven going at around 375 degrees. I highly recommend roasting these while you have other things in the oven. Anywhere between 350 - 400 is a good range to roast these at.

Step 2: Break your garlic into cloves but leave the skins on.

Step 3: Throw them on a baking sheet and put em in the oven.

Step 4: Bake until softened - about 15 minutes. You should be able to tell by their smell and by feeling for softness with your finger. Go ahead and poke one of the cloves to see if it's soft. If you want them softer you can leave them in for a bit longer, just give the pan a shake so they don't brown too much on one side.

Step 5: The skins will come off easily after they've cooled for a few minutes. Take them off and store them. You can keep them in the refrigerator for a few days or freeze them for a few months. Then when you need one just pull it out and throw it in a dish.

Roasted garlic is amazing in soups, stews, sauces, dips, on sandwiches, in mashed potatoes, etc. You can throw it into any savory dish, really!

See, wasn't that crazy easy?! No cutting off half the bulb and wasting the tips. No dousing it in oil. No waiting for an hour. Simple stuff is really great stuff.

February 8, 2013

Recipe: Creamy Kasha Breakfast Porridge

While I'm calling this a breakfast you could certainly have this as a tasty snack. Or add some more sugar and call it dessert. 

See? I'm still resistant towards breakfast. I know! EVERYONE says it's the most important meal of the day - yadda yadda yadda! Not for me, it isn't. If I feed THE BEAST (my "hunger") too early it acts like a crazy wild animal all day. I've done studies! (ON ME. This is for me personally ONLY. Do what is best for you!) So I let the beast have some tea and fruit in the mornings. We chill out and I don't go out and ran a marathon or anything. My mornings are relaxed. I figure that it all balances out this way. The Beast gets fed mid/late-morning and all is well. 

So be it breakfast, lunch, snack, dinner.. whatever... this is a new and interesting way to get in a different grain! (Well, new and interesting for me. I've never really eaten much kasha!) 


Kasha is toasted buckwheat. It's a gluten free food if that concerns you and it's got a really complex flavor. I think it's amazing in savory applications but it does sweet equally well. You can usually find it in the bulk section of your grocery store by the other grains. It's worth checking out!

I don't like most oatmeal but I love this porridge. You can top it with a bit of seeds/nuts and dried fruit or for a really tasty treat throw on some berries. It's dead winter so frozen berries it is. I cannot WAIT for summer, yall! 


 Recipe notes... 

*Use whatever kind of milk alternative that you like for this.

*You can sweeten it with stevia if you like or even a liquid sweetener. It really won't change the overall dish. I like to just use plain organic sugar.

*You can also add a bit of vanilla extract (2 teaspoons), other flavorings or some spices like cinnamon and nutmeg would be lovely. Play around with it!

Creamy Kasha Breakfast Porridge

serves 4

1 cup kasha
2 cups soy milk
1 cup water
2 teaspoons sugar
1/4 teaspoon salt

Throw everything into a medium sized saucepan and bring to a boil. Put on the lid and turn the heat down to low. Let simmer for 15-20 minutes, or until the kasha has absorbed most of the liquid.
Serve with fruit, tea, some extra soy milk, or whatever else your heart desires!

Nutritional information per serving : Serving size: 1/4 recipe 
5 WWPointsPlus, 208 calories, 3g total fat, 0mg cholesterol, 37g carbohydrates, 3.5g fiber, 5g sugar, 9g protein 


February 7, 2013

Plant Strong Success Story: how Deborah lost 116 pounds and reclaimed her health!


Today I wanted to showcase an AMAZING Plant-Based (Plant Strong) success story. My intention is to show that eating this way is not only life changing but also easy for anyone to do. Read on to see how Deborah has totally changed her health by eating Plant Strong despite living in the state known for oversized steaks and fattening comfort food!


Being Plant Strong is more than just being vegan. You focus on eating whole-foods, plant-based diet based on whole or minimally processed plants, fruits, vegetables, whole grains and legumes. It excludes animal-based foods such as meat, poultry, fish, dairy and eggs as well as oils of any kind. Minimal use of nuts, seeds, avocados and other naturally high fat plant foods is encouraged as well.


The first pic is Deborah holding a cake on her 40th birthday, the last pic was taken a couple of weeks ago after a 4 mile hike with a 50 pound pack of sand strapped to her back (she's training for a ruck march in March!)


"I started my plant based life in March of 2012.  I went to the doctor because I was having chest pains when I ate, and I was diagnosed with acid reflux. He talked to me about dietary changes and prescribed Nexium. I walked out of his office, and for some reason it struck me that at 42 years old and 338 pounds, it was only a matter of time before I had other health problems, and the medication would be for diabetes, high blood pressure, etc.  I knew that it was time to change.  I started trying to eat healthier, and then I happened upon some Netflix documentaries, including Forks Over Knives.  On March 12th, I switched to a plant based diet. Since then I have lost 116 pounds, and feel like I have gotten my life back.  I went to my doctor in November of 2012 for a physical and he was thrilled with my results.  My blood pressure and cholesterol are great, and my energy level is through the roof.  I still have some weight to lose, but I know that if I continue what I am doing, I will get there.  And the best part is I LOVE the food that I am eating.  I no longer crave sugar or any of the bad things that I used to eat. 

I am a lifelong Texan, and was raised on traditional southern comfort food.  So deciding to become plant based was a big decision for me, and one that required me to relearn everything I knew about eating and cooking. It did take a little extra time and effort to begin with, but it was really much easier to make the transition than I expected.  Now it is pretty much second nature to choose and cook the best, healthy foods.  Most days I eat oatmeal for breakfast with almond milk, walnuts, and chia seeds. Sometimes on weekends I will make tofu scramble or some other healthy plant based breakfast.  During the work week, I take my lunch from home about 90% if the time. I sometimes take giant salads, or a baked potate with some yummy toppings, veggie fajitas, or leftovers from dinner the night before.  I have 4 children and a husband who are not plant based eaters, so I do stlil cook some dishes for them with meat.  But more and more often, we are eating plant based meals at home. I have found a TON of really good recipes for plant based foods, everything from 'meat' loafs to homemade burgers, to fantastic stews and soups. It has been trial an error, because just like with traditional food, there are recipes I have tried and not liked.  But almost every one of the traditional comfort foods that I grew up with I can now recreate in a much healthier version. They have definitely all begun to eat a LOT more fruits and veggies than they did before. My children snack on fruit, or carrot sticks now instead of the processed junk that we all ate before.  That is one of the things that I feel the best about, knowing that I am teaching my children a better way, and giving them a good shot at being healthy for life.  I cannot claim to be 100% vegan, because every great once in a while I might be out somewhere and eat something that has cheese in it, becuase choices are limited, etc. But this happens less and less often, because I just don't think it is good for my body.  But I can say that I do not cook with any animal products for myself, and I also avoid cooking with oil. There is no longer any oil, butter, or many of the things that most people consider staples in my house. 
I have struggled with food addiction my entire life, and I feel like that is over now.  I eat when I am hungry, and I enjoy my food.  But I no longer crave junk food, sugary stuff, etc.  I am not starving myself, in fact my employees are shocked at how much I eat! If I am hungry, I eat. But I make sure that what I eat is as much whole, plant based food as possible.  On the rare occasions that someone brings cookies or some other treat and I decide to try one, they don't even taste good to me anymore, and leave me wondering why I even wanted it! 
I love the fact that when I cook, clean up is super easy!  There is no greasy, gooey mess to clean up.  My pans can literally be rinsed clean just by putting them under running water. When I do this, I always think that this must be how my arteries are now, nice and clean.  They are not covered in the gunk that I used to put in my body!  And when I am making homemade veggie burgers, or loaf of some kind, I can taste it while I am making it to see if it is right. No worries about E. Coli, etc.  My food is as safe to eat raw as it is cooked! 
For anyone considering plant based, I urge you to TRY IT! You have nothing to lose, and a lot to gain.  It took only about 2 weeks for me to see a HUGE difference in the way I felt. I was still severly overweight, but I suddenly felt like a new person. I woke up every morning with a ton of energy, and I felt that way all day. No more afternoon slump.  I used to be so tired by the time I got home at night that I felt like it was all I could do to manage my end of the day chores and drag myself into bed. But now I literally have energy right up until I lay down to sleep.  I also used to snore really badly, and my husband would tell me that he thought I had apnea because I would seem to stop breathing.  I never had a sleep study done, because I was afraid.  But about a month ago, I asked him if I still snored, and he said nope, that I am so quiet when I sleep now he can't tell I am breathing!  I sleep so much better than I used to, and feel refreshed every morning.
I also have struggled with IBS my whole life, and now I am completely symptom free. I am very passionate about my new lifestyle changes. I have done a lot of reading, and I believe that what I am doing is the best thing for my body. And the most convinving thing for me is the way I feel. My body tells me every day that I am doing the right thing."


Let's give Deborah a huge congratulations on her incredible life change! Your story is such an inspiration to all of us!

February 6, 2013

Recipe: Vegan Double Chocolate Pudding


Okay, so I have a problem. I LOVE chocolate. LOVE LOVE LOVE.  It's only a problem because well.. it tends to be really high in the fat/sugar department and because my lovely Mr. is allergic and gets jealous. He knows how lovely it is.

That's okay, I'll have these and he can have the Creamy Dreamy Orange Pudding! Plus I'm working on a lot of other lovely creations that both of us (and you!) can indulge in. 

Like the last pudding this is a mix of silken tofu and some other yummy things. I added in both cocoa powder and chocolate chips. It's SO tasty. It kind of reminds me of chocolate mousse but without that feeling that you just ingested 1000 calories. It is much more rich than the orange pudding but sometimes we need a little treat like this, right?!


Oh yeah and let me tell you a little secret - it was AMAZING with raspberries. Perfect. Fantastic. You can use fresh or thawed frozen berries. The tartness mixed with the creaminess of the pudding and the sweetness of the chocolate.. oh it was divine. 


Guess what! This dessert is also easy to make and very quick to whip up. You only need a few ingredients and you're good to go. The hardest part about this is waiting for it to set up in the refrigerator for a while. I think you can handle it though, right? (Or just sneak some before it's ready...)


Recipe notes...

* Using SILKEN tofu is a MUST here. You cannot substitute regular tofu for this. It will taste bad.

* You can use whatever kind of vegan chocolate chips you have on hand. I haven't tried it with carob chips yet because I JUST thought of it but I'm going to and then I'll update you. I have a feeling it will be tasty!


Vegan Double Chocolate Pudding

4 servings


1 package lite silken tofu (Mori-nu brand suggested)
1 Tablespoon unsweetened cocoa powder
1/2 cup vegan dark chocolate chips
1/2 teaspoon vanilla extract


Melt the chocolate chips in the microwave (it takes about 45 seconds to melt them) or over a double boiler. Pour the melted chocolate and remaining ingredients into a blender. Blend on high until very smooth. Pour into serving glasses and refrigerate for at least 1 hour to set.
Enjoy!

Nutritional information per serving : Serving size: 1/4 recipe 
5 WWPointsPlus, 174 calories, 9g total fat, 0mg cholesterol, 19.7g carbohydrates, 0.5g fiber, 16.4g sugar, 5.6g protein 

February 4, 2013

Recipe: Vegan Orange Cream Pudding

Have you noticed that I don't have like.. well.. any... desserts posted? It's not that I don't love them. I DO! I just want to post fun, easy, healthy, and (most of the time!) single serving desserts so that we don't all get ourselves into trouble with a huge pan of brownies. 

See, I'm not impressed with people that can use "vegan butter" or cups of oil in a dessert and call it vegan. Don't forget friends, vegan does not equal healthy. 

So I decided that I would finally start working on some fun plant strong desserts that are within my own personal guidelines. It is WORK too, by the way. It's not that easy to make a dessert that is universally appealing that doesn't contain gobs and gobs of fat. 


Oh and I had one other thing I wanted to work around in at least some of the desserts. Allergies. More that that though. The Mr. is allergic to CHOCOLATE. WHAT!!! I know, right? Worst allergy ever. So I made this yummy pudding just for him. 


It's lightly sweetened and tastes a lot like those orange creamcicles that we ate as kids.  Well, the more adult version anyhow. You could add some food coloring to make it bright orange if you feel the need. I don't need to. A bit of orange zest and everyone knows what you're having.


Oh, I haven't tried to freeze it yet but if anyone else wants to try to throw some in a ice pop mold and tell me how it turns out I would LOVE to hear about it. It may need more sugar for that though. I'll get back to ya on that.


Recipe notes...

* Using SILKEN tofu is a MUST here. You cannot substitute regular tofu for this. It will taste bad. That goes for any other time I call for silken tofu in a recipe. It's totally different stuff, guys! Silken tofu is mild and should not taste "beany" at all.

* You can use whatever sweetener you'd like for this recipe. If you use a liquid one it will be a bit softer in consistency but it will still taste yummy!


Vegan Orange Cream Pudding

4 servings


1 package lite silken tofu (Mori-nu brand suggested)
3 Tablespoons sweetener of your choice (organic sugar, sugar substitute, agave, etc)
2 teaspoons vanilla extract
3/4 teaspoon orange extract
1 teaspoon orange zest (optional but suggested!)

Blend together until very smooth. Pour into serving glasses and refrigerate for at least 1 hour to set.
Serve with fruit, granola, or on top of pancakes!

Nutritional information per serving : Serving size: 1/4 recipe (calculated using organic granulated sugar)
2 WWPointsPlus, 67 calories, 0.7g total fat, 0mg cholesterol, 10.4g carbohydrates, 0g fiber, 9.8g sugar, 5.3g protein 

January 29, 2013

Recipe: ABC soup (it's easy as 123!)

I don't know about you, but I don't miss being a kid. It feels like such a hard time. So much learning, so much misunderstanding, so little knowledge, so little freedoms. On the other hand I do have some fond memories and some of them, of course, are related to foods. 

I loved eating alphabet soup! You could find the letters you wanted and spend half the afternoon just slurping away and playing with your food. Somehow it was more encouraged to play with this magical soup because there were letters in it. 

I have been looking for alphabet noodles for YEARS now. It seemed like no places had them. None. Well, one day when I wasn't looking for them I spotted them. In the ethnic section of my regular grocery store right between some salsa and cans of beans. You can also buy them online.


If you can't find the alphabet noodles or just don't care that much (you bore, you!) you can throw in some ditalini pasta instead. I can always find that next to the rest of the noodles at the grocery store. Heck, you could even use some small elbow noodles if you wish.


Don't forget to find your name in the soup! (My daughter is too young for that but she loved seeing "numbers!" as she calls them right now in her soup. She also loved this soup - woohoo! So did mom and dad!) 


Recipe Notes...

*You can add additional fresh vegetables or change out some of the ones I have listed. Use what you have and use what's in season. 

*You can use any small pasta you want if you cannot find the alphabet noodles. 


ABC Soup

8 - 1. 5 cup servings 

1/2 large onion, chopped
2 stalks celery, chopped
1 carrot, peeled and sliced 
1 small potato, scrubbed and diced
1 zucchini, chopped
1 cup cabbage, shredded
2 cloves garlic, minced
1 teaspoon dried oregano
1/2 teaspoon kosher salt
1 - 14oz can diced tomatoes
5 cups vegetable broth
1/2 cup uncooked alphabet noodles
ground black pepper to taste


Add the onions, celery and carrot to a large soup pot. Sprinkle the vegetables with the salt and cook over medium high heat until the onions are translucent. You may need to add a couple tablespoons of water to keep the vegetables from sticking to your pot.
Add all of the remaining ingredients to the pot and turn the heat to high. Bring to a boil. 
Once boiling place the lid on and turn the soup to low. Let simmer for 15-20 minutes or until the potatoes are tender. 
Add salt and pepper to taste. Enjoy with crackers and your favorite memories! 

Nutritional information per serving : Serving size: 1.5 cups soup
2 WWPointsPlus, 92 calories, 0.3g total fat, 0mg cholesterol, 20.2g carbohydrates, 3g fiber, 3.9g sugar, 2.8g protein 


January 28, 2013

Recipe: Easy Creamy Avocado Curry

I love eating out. It's such a treat for us. I do it once in a while and I had a dish like this at a local restaurant. When I saw avocados on sale I knew I had to recreate it for yall! (Okay, well mostly for myself... but you're going to seriously thank me for this!)

I know, it seems like I'm using a lot of avocados these days with the guacamole and now the curry. I actually don't eat that much avocado because of the calorie/fat density but hear me out on this! This one is only 1 avocado for 6 servings - but it is AMAZINGLY rich, decadent and creamy. I can't believe how easy and delicious this sauce is. And 1/6 of an avocado for a huge meal packed with veggies is really a fair deal, don't ya think?

The first time I accidentally made it a bit too spicy for my daughter (which means that the Mr. and I were chugging water as well.. she has a HIGH tolerance for spicy food!) I cut back on the jalapeno in the dish but you can leave it out entirely or add more. It's really up to your own tastes.


We also have made this with shelled edamame instead of tempeh and it was well received. I just feel like tempeh is better for curries and stir-fries.  You can add whatever you want for protein (or leave it out entirely and have this as an all vegetable curry. It still has PLENTY of protein!)
Also, the leftovers were even BETTER the next day.


Recipe notes...

* You can leave out the spicy jalapeno if you are worried about it being too spicy.

*Make sure you buy a mild curry powder for this dish.

*If you'd like a coconut curry flavor you can add 1/2 teaspoon coconut extract. We've tried it both ways and while I don't think it's essential to the dish, I did think was good. Especially if you are avoiding high fat coconut and miss coconut curry dishes.

*If you can't find garam masala you can instead add 1 teaspoon of cumin powder, 1/2 teaspoon cinnamon, and 1/2 teaspoon paprika.

*Use whatever vegetables you like for the curry! We included broccoli, red peppers, onions, carrots, zucchini and rainbow chard. A few other additions that might tickle your taste buds: kale, cabbage, eggplant, thinly sliced sweet potatoes, cauliflower, mushrooms, white potatoes, spinach, collard greens, baby corn, etc. Go wild! This sauce makes everything taste SO good.

*If you are allergic or avoiding soy you can do the following:  In the sauce replace the silken tofu with 1/4 cup rice flour. Increase the milk alternative (use almond, hemp, etc) to 2 & 1/4 cups. Heat the sauce until thickened. Add in garbanzo beans or seitan instead of the tempeh.

*This is still a high fat dish so I would save it for a once in a while treat. It's still far lighter than any creamy dish you'll find eating out!


Easy Creamy Avocado Curry

serves 6

Sauce:
1 avocado, pit removed and flesh scooped out
1 teaspoon lime juice
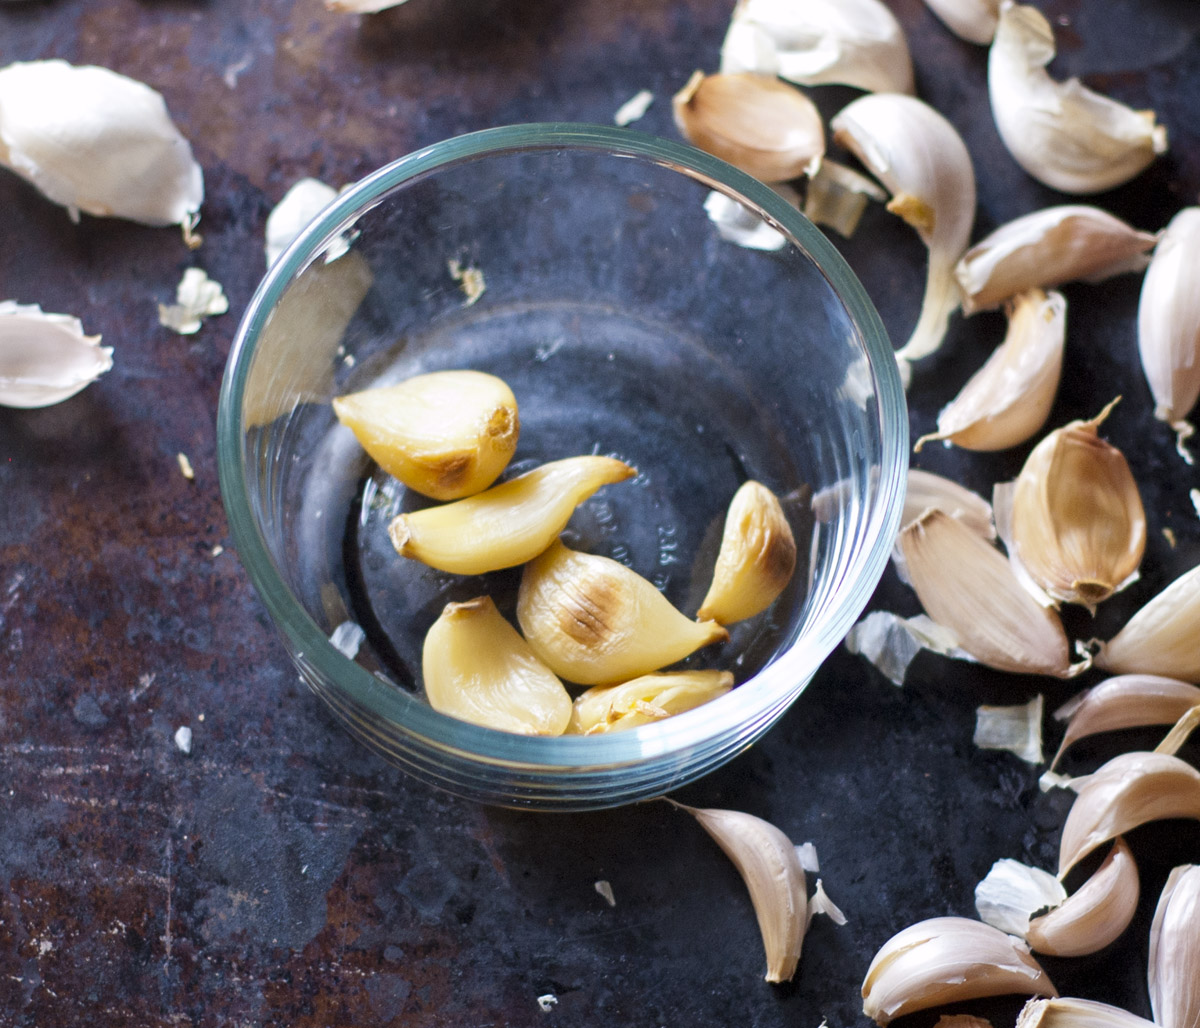
2 cloves garlic, peeled and smashed
1 teaspoon fresh grated ginger
1/2 jalapeno, seeds and membrane removed (optional)
1/4 onion, chopped (sweet onion if you can find them)
1/2 package silken lite tofu (like Mori-Nu brand)
2 cups soy milk (or your favorite milk alternative)
1 Tablespoon curry powder
2 teaspoons garam masala
1 teaspoon salt

6 cups mixed vegetables (1 cup per serving - you can always add more!)
8 oz tempeh, cubed (or tofu, edamame, or garbanzo beans)
1 Tablespoon soy sauce + 1/4 cup water


Lightly steam your vegetables. You want them to be tender crisp.
Heat up your tempeh in a large nonstick pan with the soy sauce and water. I like to steam-fry it (cook it at a high temperature with water or other liquid.) Cook until lightly browned.
Sauce:
Place all of the sauce ingredients in your blender and blend until very smooth. Taste to check the seasonings and add in additional salt or lime juice if necessary.
Add your steamed vegetables to the tempeh. Pour the sauce over the vegetable mixture and stir to combine. Heat over medium low heat until warmed through.
Serve with brown rice and some very thin slices of avocado ( 100% optional. I didn't eat mine with avocado on top but my daughter, the avocado fanatic, did!)


Nutritional information per serving : Serving size: 1/6th of the dish (Vegetables are not included in this calculation because of the variables in your choosing. Calculations include the sauce and tempeh.)
5 WWPointsPlus, 171 calories, 10.2g total fat, 0mg cholesterol, 10.3g carbohydrates, 2.5g fiber, 2.3g sugar, 12.3g protein